")
When it comes to your data, you may either restore it from a backup or start again if your iPhone is lost or broken. It’s far more enjoyable to have a backup, so make the time to regularly perform backups on your iPhone. Here’s how, including the details of each technique.
Why Would You Want to Backup Your iPhone?
Even though it costs money to replace your phone, the priceless information stored on your smartphone is far more significant. You risk losing priceless images and movies, out-of-synchronized notes, and other data that your apps depend on if you don’t have a backup.
It takes work to set up your gadget again and try to recall every setting you have. For piece of mind, you’d be far better off using that time to create a backup. After that, you can restore your iPhone backup and everything will function normally in the event that you misplace your phone or experience a problematic update.
The more frequently you backup your critical files, the less you stand to lose in the event of an emergency. It is therefore imperative for each user of an iPhone or iPad to have a regular backup plan.
How to Use iCloud to Backup Your iPhone
Here’s how to see if your smartphone has iCloud backup activated already, and if not, how to use it:
- Navigate to Settings, then tap iCloud after finding your name at the top of the page.
- Select iCloud Backup from Device Backups.
- You will see the most recent backup timestamp under Back Up Now if you have enabled Back Up This iPhone.
- Turn on the feature by toggling the Back Up This iPhone slider if you haven’t already backed up to iCloud.
- If your phone is locked, charging, and online, you can choose to perform a manual backup by tapping Back Up Now, or you can let it happen automatically.
- If you want your phone to backup even when it’s not connected to Wi-Fi and you don’t care about data charges, you may turn on Back Up Over Cellular.
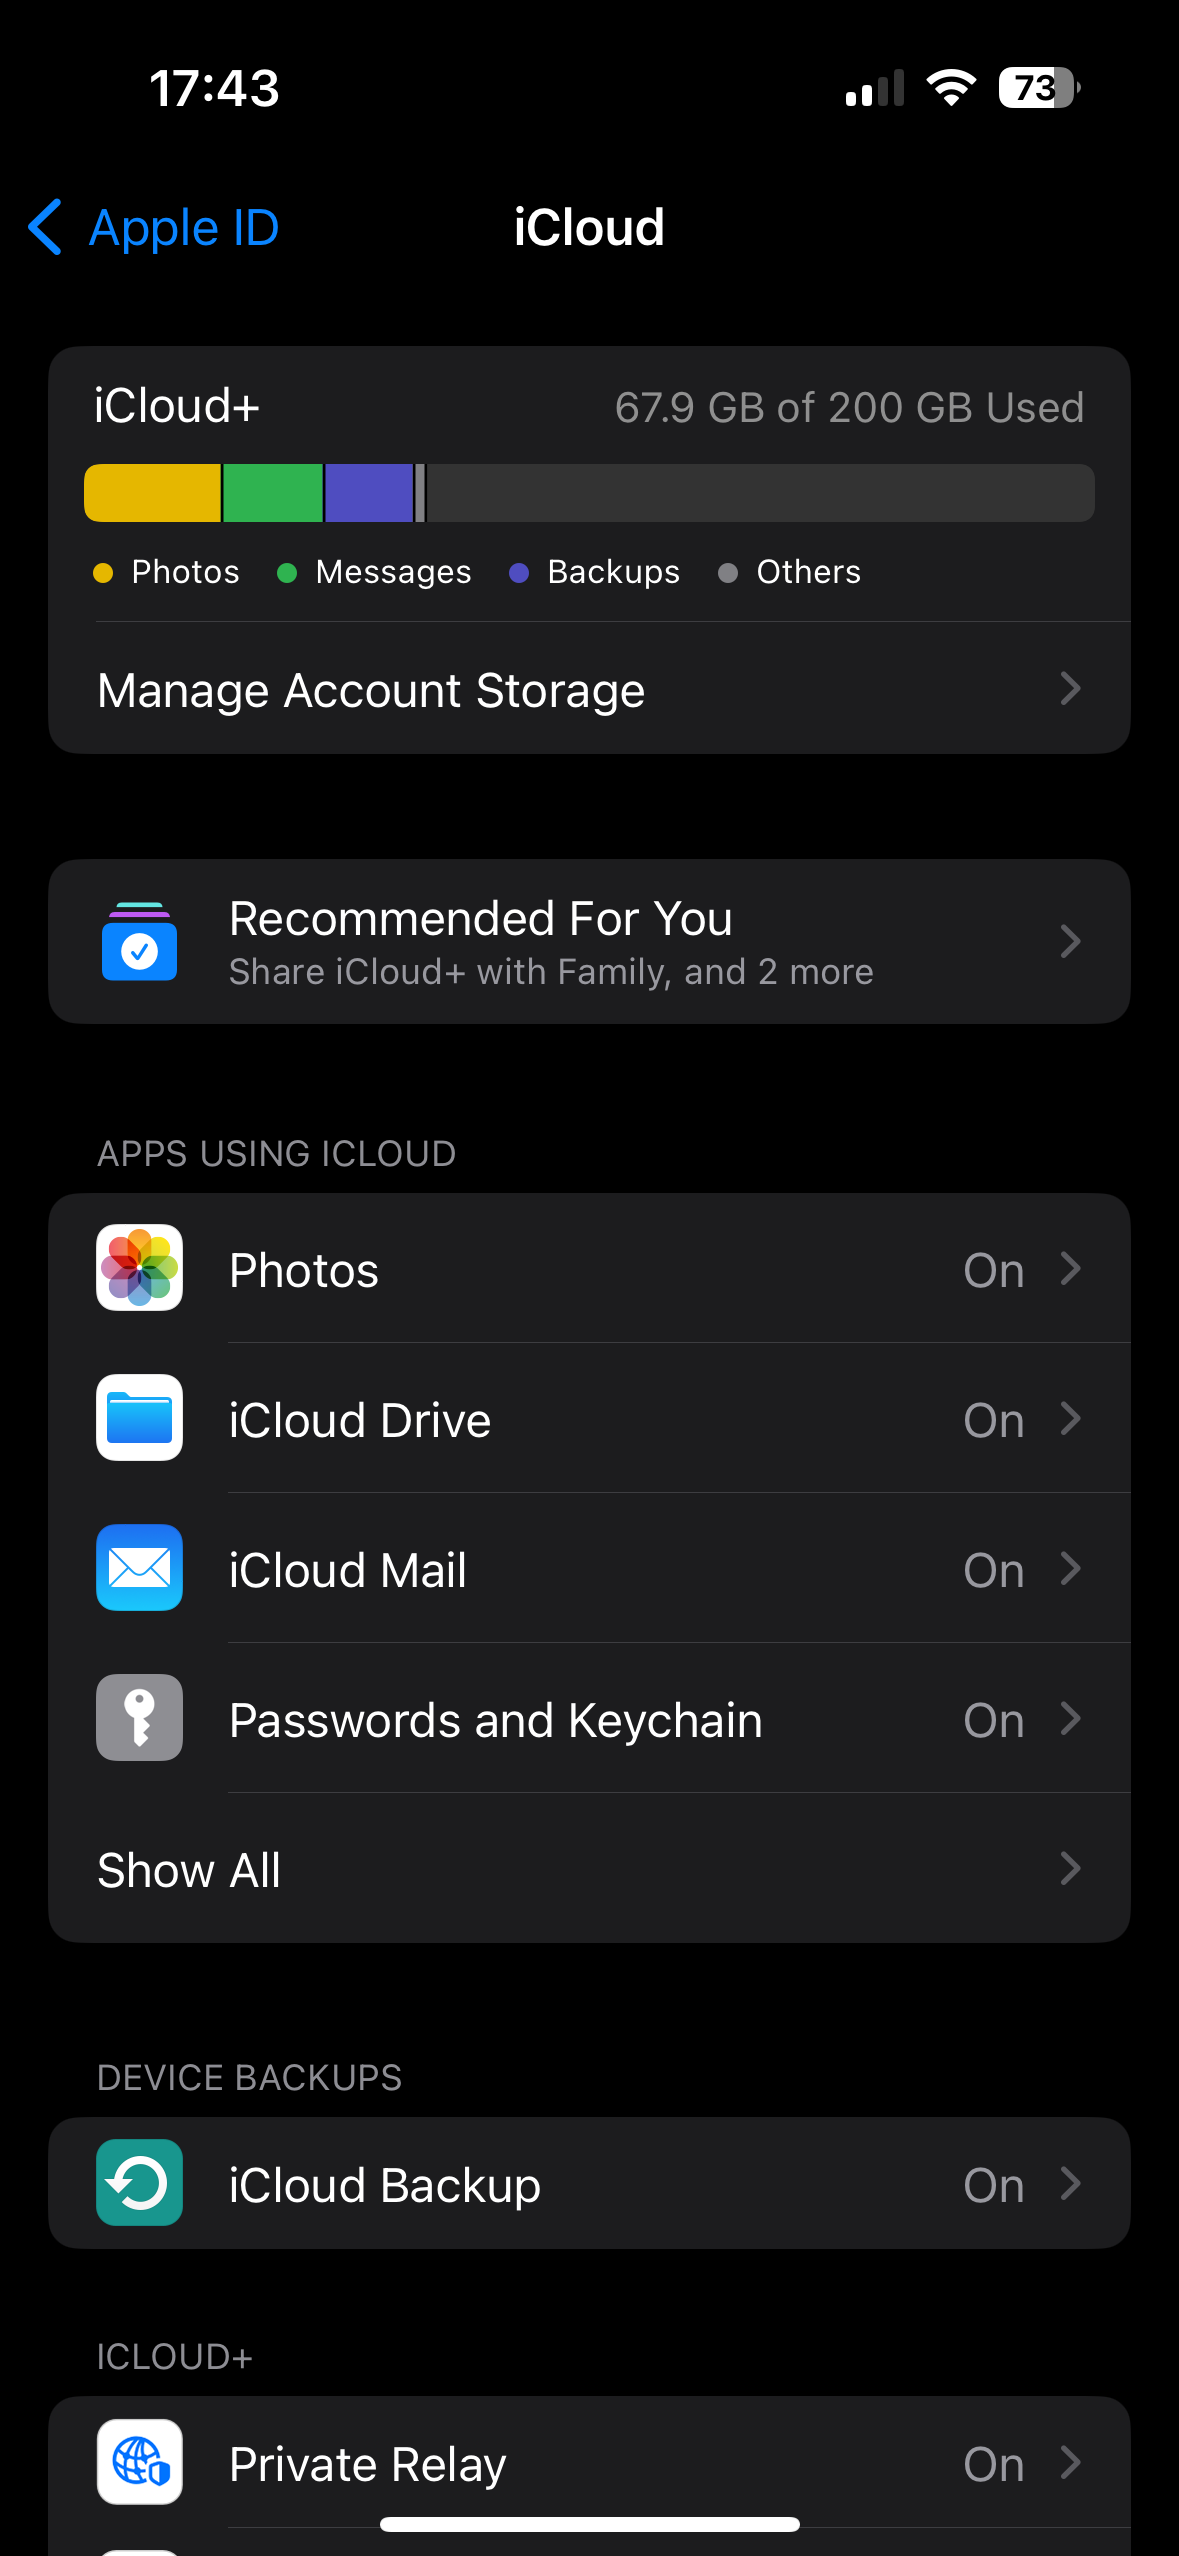
Backing up your iPhone to iCloud is probably not a practical choice unless you have paid extra for additional capacity. The 5GB of free iCloud space that Apple offers is probably insufficient for the amount of data you should back up on your phone. You’ll need to pay for more storage, make space in iCloud, or back up your iPhone to your computer if you receive a notification that you don’t have enough iCloud space for a backup.
Return to the iCloud menu to view a breakdown of the contents occupying your cloud storage space. To examine a more thorough breakdown of the amount of iCloud storage your apps are utilising, choose Manage Account Storage. You can then choose an app to modify or remove its contents. If you decide to purchase more, select Change Storage Plan.

Navigate to Settings > [Your Name] > iCloud > Manage Account Storage > Backups to alter which app data is included in your device’s backup. All of the stuff your device is backing up to iCloud is visible when you tap it. Turn off an app’s slider to remove it and free up space.
How to Make a PC or Mac Backup of Your iPhone
To use your computer to create a backup:
- Download and launch iTunes on Windows. Open Finder on a Mac.
- Use a Lightning or USB-C cable, depending on which is appropriate, to connect your iPhone to your PC. If this is the first time you have linked your phone to your computer, accept the security prompt.
- When the device symbol shows in iTunes, click it in the upper-left corner of the window (see below). Choose your phone from the Locations section on the left sidebar of Finder.
Select Manually Back Up and Restore, then click Back Up Now on the Summary (iTunes) or General (Finder) page. Then, wait for the operation to finish.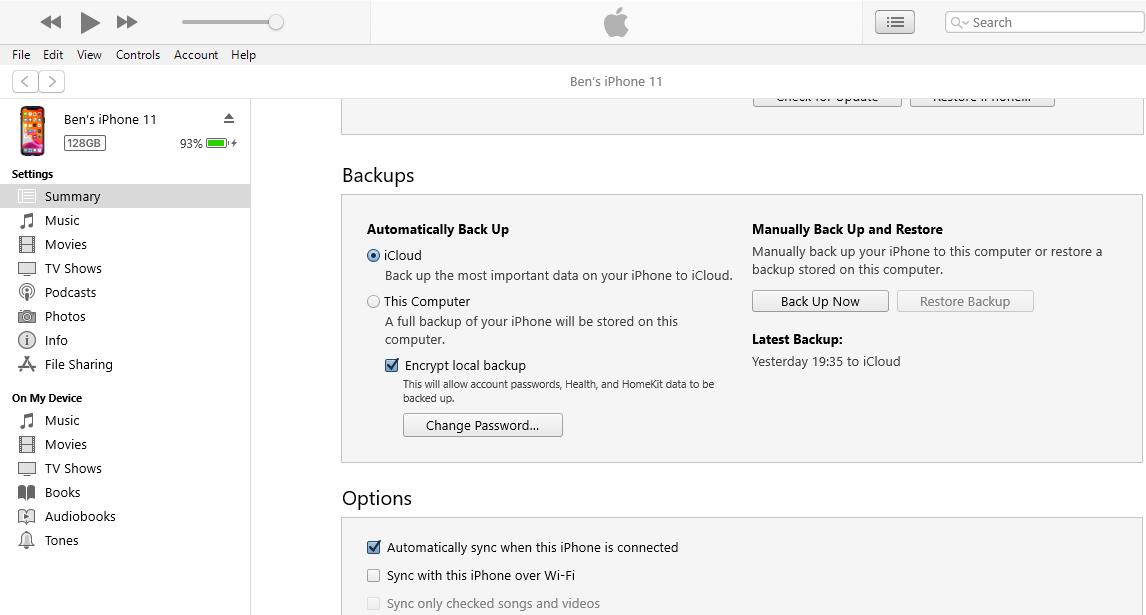
To include sensitive data in your backup (which is usually a good idea), choose Encrypt local backup and provide a password. Although this is an additional step, it allows you to preserve passwords, access to your health information, phone and internet histories, and Wi-Fi network details. This data is excluded from the backup if encryption is not used.
You will be unable to access this backup if you lose the encryption password, so be careful to store it somewhere secure, such as a password manager.
Finally, choose This Computer under Automatically Back Up if you want to frequently backup your iPhone in this manner. This will cause backups to be made by iTunes/Finder whenever you connect your iPhone to a computer.
If your computer isn’t big enough to hold your iPhone backups, you can always buy one of the finest portable SSDs to expand your storage.
Is It Better to Use iCloud or Your Computer to Backup Your iPhone?
Which iPhone backup option should you use now that you are familiar with the procedure for both? Each has advantages and disadvantages.
iCloud Backup for Your iPhone
Although iCloud backups are easy to use, as we discovered, you will most likely need to buy additional iCloud storage in order to make full use of it.
Once enabled, iCloud backups happen automatically when your phone is not in use, plugged in, and connected to the internet via Wi-Fi or cellular data. This usually means that backups happen at night while your device charges.
It will take some time for your iPhone to upload everything to the server during your first iCloud backup. Future backups are quick since they only transfer updated or new data. Your final iCloud backup is kept for 180 days before it is erased if you decide to stop using it.
The following is covered by iCloud backups:
- App information
- Backups for Apple Watches
- Settings on iOS
- Your Home Screen and app layout Messages content (including SMS texts and iMessages), if it hasn’t previously been synchronised with iCloud
- Pictures and videos that haven’t been synchronised with iCloud
- Your history of purchases from all Apple products
- Ringtones
- Password for visual voicemail
Everything you currently have stored in iCloud, including contacts, notes, and iCloud photos, is not backed up when backing up your iPhone to iCloud. Go to Settings > [Your Name] > iCloud and select Show All under Apps Using iCloud to view the contents of your iCloud storage.
Using iTunes or the Finder to Backup Your iPhone
Although backing up to your PC is less handy than restoring from iCloud, the only restriction is the amount of storage space on your computer. Similar to iCloud, only updated data is copied from the first, massive backup that takes a time to complete.
Remembering to perform the procedure manually is the main issue with depending solely on iTunes/Finder backups. You’ll need to develop the habit of connecting your iPhone to your computer if you don’t already. If not, when something goes wrong, your most recent backup can be weeks or months old.
It can also be a concern to have adequate storage on your computer to hold the amount of your iPhone backup.
According to Apple, backing up to a computer contains “almost all of your device’s data and settings.” What it does not include is as follows:
- Content imported into Apple Books from the iTunes Store and App Store, as well as any PDFs you downloaded
- Anything you imported as MP3s or videos from Finder or iTunes and synced
- Data already kept in iCloud, including as messages sent via iMessage and iCloud Photos
- Touch ID/Face ID details
- Apple Pay information
- Email data files
To create an encrypted backup of your Activity, Health, and Keychain data, follow the above instructions.
Keep in mind that backing up your iPhone to the Finder or iTunes differs from syncing it with iTunes. When you backup, a copy of your files is created for storage. Syncing ensures that the material on your iPhone and the music, movies, images, and other files you have stored in iTunes match.
Any backup is preferable to none at all. We advise backing up to iCloud for the majority of users because it automatically safeguards your data. It just costs a few bucks a month to safeguard priceless images and preferences that can take hours to recover.
If you are unable to pay for iCloud storage, be careful to regularly backup your data using iTunes or the Finder. You should periodically create computer backups in case of emergency as well as routinely backup your data to iCloud for total piece of mind.
Leave a Reply